It’s just a small leak—a dripping pipe under the sink, a little water from a window after heavy rain, or a minor appliance overflow. It’s easy to wipe up the water and assume the problem is solved. But the hidden danger of even a minor leak isn’t the water you see; it’s the moisture you don’t.
mold can begin to grow in as little as 24 to 48 hours in the right conditions. Any damp organic material, like drywall, wood, or carpet padding, becomes a potential breeding ground. Taking immediate and thorough action after a small leak is the key to preventing a much larger mold problem down the road.
Follow these critical steps to ensure a minor water issue stays minor.
Step 1: Stop the Leak at the Source
This is the obvious first step. You can’t start the drying process if more water is coming in. Turn off the water supply to the leaking pipe or appliance. For a leaking window or roof, you may need to perform a temporary fix until a permanent repair can be made.
Step 2: Remove All Standing Water
Use towels, a mop, or a wet/dry vacuum to remove every bit of standing water from the floor and other surfaces. The faster you remove the bulk of the water, the less moisture will be absorbed into surrounding materials.
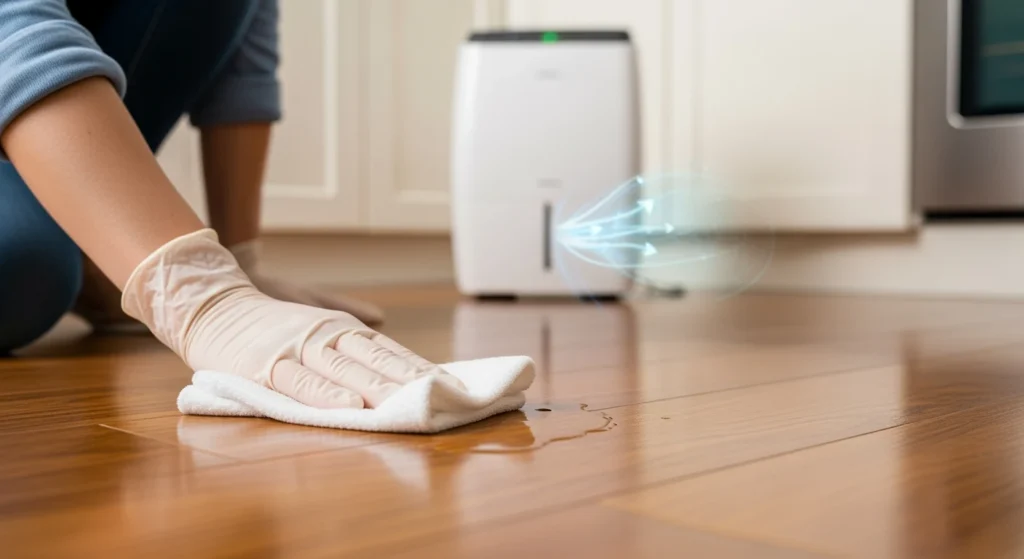
Step 3: Dry Everything Completely
This is the most crucial step. “Visibly dry” is not enough. Moisture can hide within materials, and this is where mold thrives.
- Increase Air Circulation: Open windows (if humidity outside is low) and use fans. Position box fans or oscillating fans to blow air directly across the damp surfaces. This speeds up evaporation.
- Use a Dehumidifier: A dehumidifier is your most powerful tool. It will pull residual moisture out of the air and from deep within materials like drywall, carpet, and wood subfloors. Run it continuously in the affected area for several days. Aim to get the relative humidity below 50%.
- Remove Affected Items: If items like rugs, books, or cardboard boxes got wet, move them out of the area. Some items may need to be discarded if they cannot be dried completely within 24-48 hours. Lift wet carpet to allow air to circulate underneath and dry the padding.
Step 4: Clean and Sanitize
Once the area is completely dry, clean the affected surfaces. For non-porous surfaces like tile or vinyl, you can use a simple soap and water solution. For wood or drywall, wipe them down with a damp cloth. This removes any initial mold spores that may have settled before they have a chance to grow.
Step 5: Monitor the Area
For the next few weeks, keep a close eye (and nose) on the area where the leak occurred. Look for any signs of discoloration or staining on walls or baseboards. Be alert for any musty or earthy smells. If you notice either, it’s a sign that the drying was incomplete and mold may be growing.
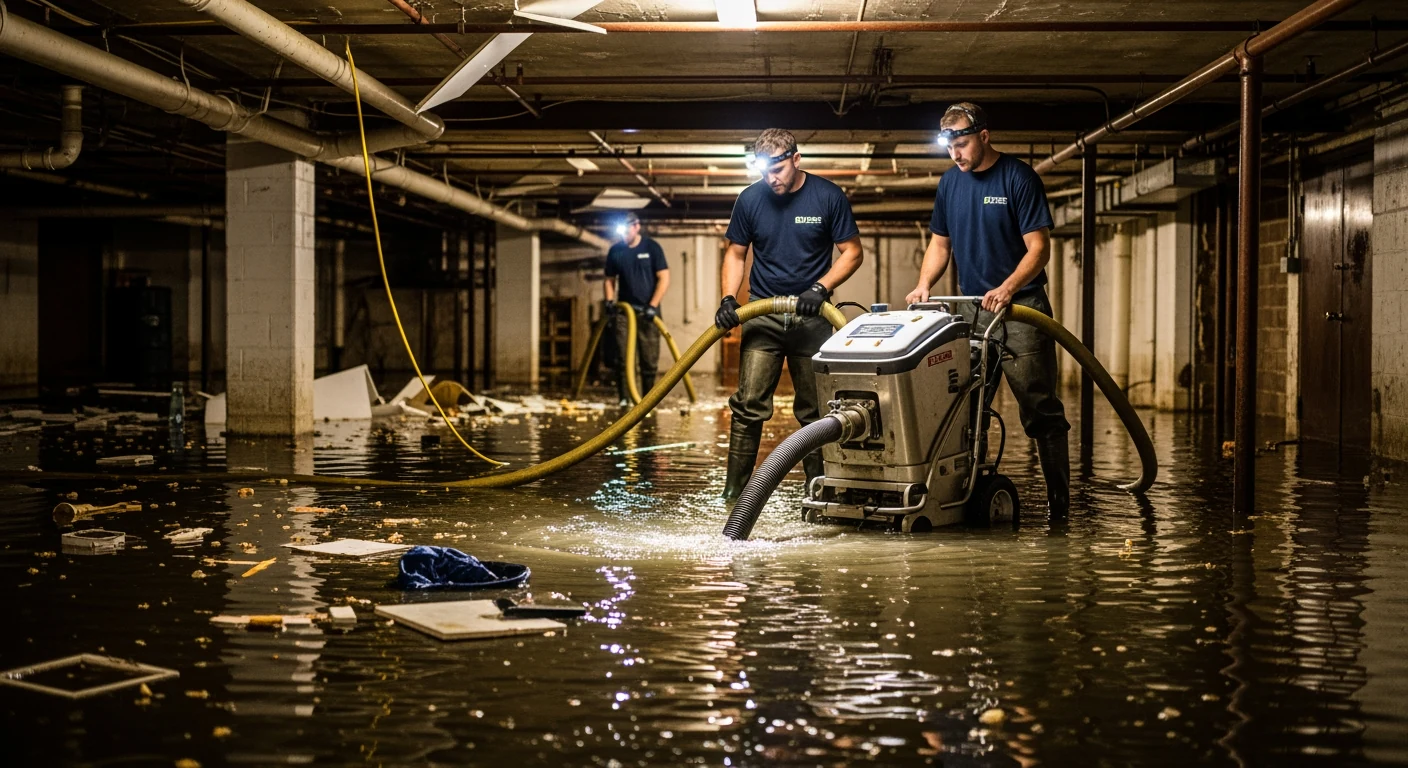
When to Call a Professional
If the leak was large, went unnoticed for a long time, or involved contaminated water (from a drain or toilet), it’s best to call a professional restoration company.
Upper Restoration provides professional mold removal and remediation services across Nassau County, Suffolk County, and all five NYC boroughs — available 24/7.
Upper Restoration uses specialized tools like moisture meters and thermal imaging cameras to find all hidden moisture. Our industrial-strength air movers and dehumidifiers ensure a complete and rapid dry-out, eliminating the risk of secondary mold damage. Don’t let a minor leak become a major headache.