Attic Mold: Attic mold develops when warm, humid air from the living space rises into the attic and condenses on cold roof decking, rafters, or insulation. In Long Island’s coastal climate, condensation-driven attic mold is the most common mold problem in residential buildings — and the most frequently missed, because attics are rarely inspected until a home sale or roofing project reveals it. The most common species are Cladosporium, Penicillium, and Aspergillus; Stachybotrys is less common in attics because it requires prolonged saturation rather than condensation.
Attic mold is a common problem that many homeowners face, often without realizing it until significant damage has occurred. Identifying the type of mold present in your attic is crucial for determining the appropriate remediation strategy and preventing future growth. This comprehensive guide will walk you through the process of inspecting your attic for mold and help you identify the most common types you may encounter.
The Importance of Attic Mold Inspection
Regular attic inspections play a crucial role in maintaining the structural integrity of your home and ensuring a healthy living environment. Mold growth in the attic can lead to a variety of issues that can significantly impact both your property and your health. These problems include respiratory issues, allergic reactions, weakening of wooden structures, decreased property value, and unpleasant odors that can permeate throughout your house. By identifying mold early through regular inspections, you can address the problem before it becomes severe, ultimately saving time, money, and potential health complications.
Preparing for an Attic Inspection
Before embarking on an attic inspection, it’s essential to gather the necessary tools and take proper safety precautions. Essential tools for a thorough inspection include a flashlight or headlamp for proper visibility, protective gear such as gloves, mask, and goggles to ensure personal safety, a camera or smartphone for documentation purposes, and a moisture meter (though optional, it’s highly recommended) to detect hidden moisture. Safety should always be the top priority when inspecting your attic, so it’s crucial to wear appropriate protective gear to avoid direct contact with mold spores, ensure proper ventilation during the inspection, and be cautious of your footing, especially in areas with loose insulation. If you have respiratory issues or allergies, it may be wise to consider hiring a professional inspector to conduct the examination on your behalf.
Common Types of Attic Mold
Understanding the characteristics of different mold types can significantly aid in identifying what’s growing in your attic. One of the most notorious types is Stachybotrys, often referred to as “black mold,” which appears dark green or black with a slimy texture. This mold thrives in damp, humid environments with high cellulose content and can cause severe respiratory issues and allergic reactions. Another common type is Aspergillus, a genus that includes several species frequently found in attics. Aspergillus usually appears white or gray, sometimes with yellow or green tints, and can grow on various surfaces, including wood and insulation. It may cause respiratory infections, especially in immunocompromised individuals.
Penicillium is another mold type often encountered in attics. While some Penicillium species are used to produce antibiotics, others can be harmful in the home environment. This mold typically appears blue or green with a fuzzy texture, prefers cooler temperatures, and can grow on many materials. Penicillium can trigger allergic reactions and asthma attacks in sensitive individuals. Lastly, Cladosporium is particularly common in attics and can grow even in cooler temperatures. It has an olive-green to brown or black appearance with a suede-like texture and is often found on wood surfaces and fabrics. Cladosporium may cause respiratory issues and skin irritation in some people.
Identifying Mold in Your Attic
When inspecting your attic for mold, it’s important to pay attention to several key indicators. Visual cues are often the most obvious signs of mold growth. Look for discoloration on surfaces, particularly dark spots or patches on wood beams, rafters, or sheathing. You may also notice fuzzy or slimy growths on insulation or stains on ceiling joists or around roof penetrations. In addition to visual signs, mold often produces a distinct musty smell. If you notice a persistent earthy or damp odor in your attic, it could indicate the presence of mold growth.
Since mold thrives in damp environments, identifying sources of moisture is crucial for a comprehensive inspection. Check for roof leaks or condensation, which can provide the moisture necessary for mold growth. Look for signs of water damage on wood or insulation, as these can be indicators of ongoing moisture problems. Using a moisture meter can be particularly helpful in detecting hidden moisture in materials, allowing you to identify potential problem areas before visible mold growth occurs.
Steps for a Thorough Attic Mold Inspection
Conducting a comprehensive attic mold inspection involves several key steps. Begin by entering the attic safely, ensuring proper lighting and secure footing. Once inside, scan the entire attic space, paying close attention to corners, joints, and areas near vents or chimneys where moisture might accumulate. Carefully examine the underside of the roof sheathing, rafters, and trusses, as these areas are particularly susceptible to mold growth. Inspect the insulation for any signs of discoloration or dampness, which could indicate mold presence or moisture issues. For a complete breakdown of pricing, see our guide to mold inspection cost on Long Island.
As you continue your inspection, check around pipes, vents, and any areas where condensation might occur. These are common trouble spots for mold growth due to the potential for moisture accumulation. Throughout the inspection process, it’s crucial to document your findings with photos and notes. This documentation will be invaluable for future reference or if you need to consult with a professional. By following these steps, you can ensure a thorough examination of your attic space and increase the likelihood of identifying any mold issues early.
Signs of Mold in the Attic: What to Look For Without Going Up
Most Long Island homeowners discover attic mold during a home inspection before a sale — not because they noticed warning signs. But there are indicators visible from the living space that suggest attic mold may be present:
- Dark staining on ceiling surfaces near the roofline: Water stains that appear in winter or after temperature swings indicate condensation or ice dam intrusion — the same conditions that produce attic mold
- Musty odor strongest in upper floors or in the master bedroom: Attic mold produces mVOCs that migrate through ceiling penetrations (recessed lights, attic hatches, bathroom exhaust fans)
- Frost on the underside of the roof deck in winter: Visible through an attic hatch — frost indicates warm, moist air reaching cold roof surfaces, the precise mechanism of condensation mold formation
- Black or dark staining visible through the attic hatch: Even a quick look with a flashlight from the hatch opening can reveal dark discoloration on roof decking or rafters
- Unexplained increases in heating/cooling costs: Compromised insulation from moisture intrusion or mold damage reduces thermal performance
What does mold look like in an attic? Attic mold most commonly appears as dark staining (black, gray, or greenish) on the wood surfaces of roof decking and rafters — often starting at the ridge and spreading downward, or concentrated around exhaust fan terminations where moist air exits directly onto cold wood. It can be mistaken for normal wood darkening or dirt. If you see any dark discoloration on attic wood that wasn’t there before, treat it as suspect until inspected professionally.
When to Call a Professional
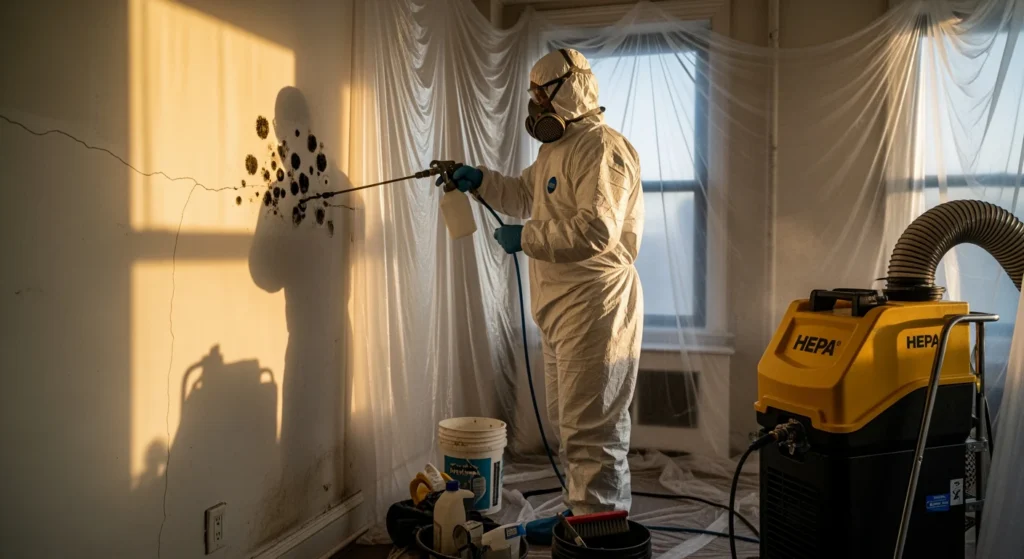
While minor mold issues can sometimes be addressed by homeowners, there are several situations where it’s best to consult a professional mold remediation specialist. If the mold covers a large area (more than 10 square feet), it’s generally advisable to seek professional help due to the potential health risks and the complexity of proper removal. Similarly, if you suspect the presence of black mold (Stachybotrys), it’s crucial to involve experts due to its particularly harmful nature. If you or family members experience health symptoms that may be related to mold exposure, such as persistent respiratory issues or unexplained allergic reactions, it’s important to have the situation assessed by professionals.
There are also structural and environmental factors that may necessitate professional intervention. If the mold is difficult to access or appears to be within the structure of the home, attempting DIY removal could potentially cause more damage or spread the mold further. Additionally, if you’re unable to identify the source of moisture causing the mold growth, a professional can help pinpoint the root cause and develop an effective remediation plan. In these situations, the expertise and specialized equipment of professional mold remediation specialists can ensure thorough and safe mold removal, as well as implement strategies to prevent future growth.
Preventing Future Mold Growth
After identifying and addressing existing mold issues, it’s crucial to take proactive steps to prevent future growth. Ensuring proper attic ventilation is key to reducing humidity levels, which can significantly inhibit mold growth. This may involve installing or upgrading ventilation systems to promote air circulation and moisture control. Additionally, promptly fixing any roof leaks is essential, as even small leaks can create ideal conditions for mold to thrive if left unaddressed.
Proper insulation plays a vital role in preventing condensation, another common source of moisture that can lead to mold growth. Installing and maintaining adequate insulation can help regulate temperature and moisture levels in your attic. In particularly humid environments, using a dehumidifier may be necessary to keep humidity levels below 60%, which is generally considered the threshold above which mold growth becomes more likely. Lastly, conducting regular attic inspections is crucial for catching any issues early. By implementing these preventive measures and maintaining vigilance through routine checks, you can significantly reduce the risk of future mold growth in your attic, ensuring a healthier home environment for years to come.
Conclusion
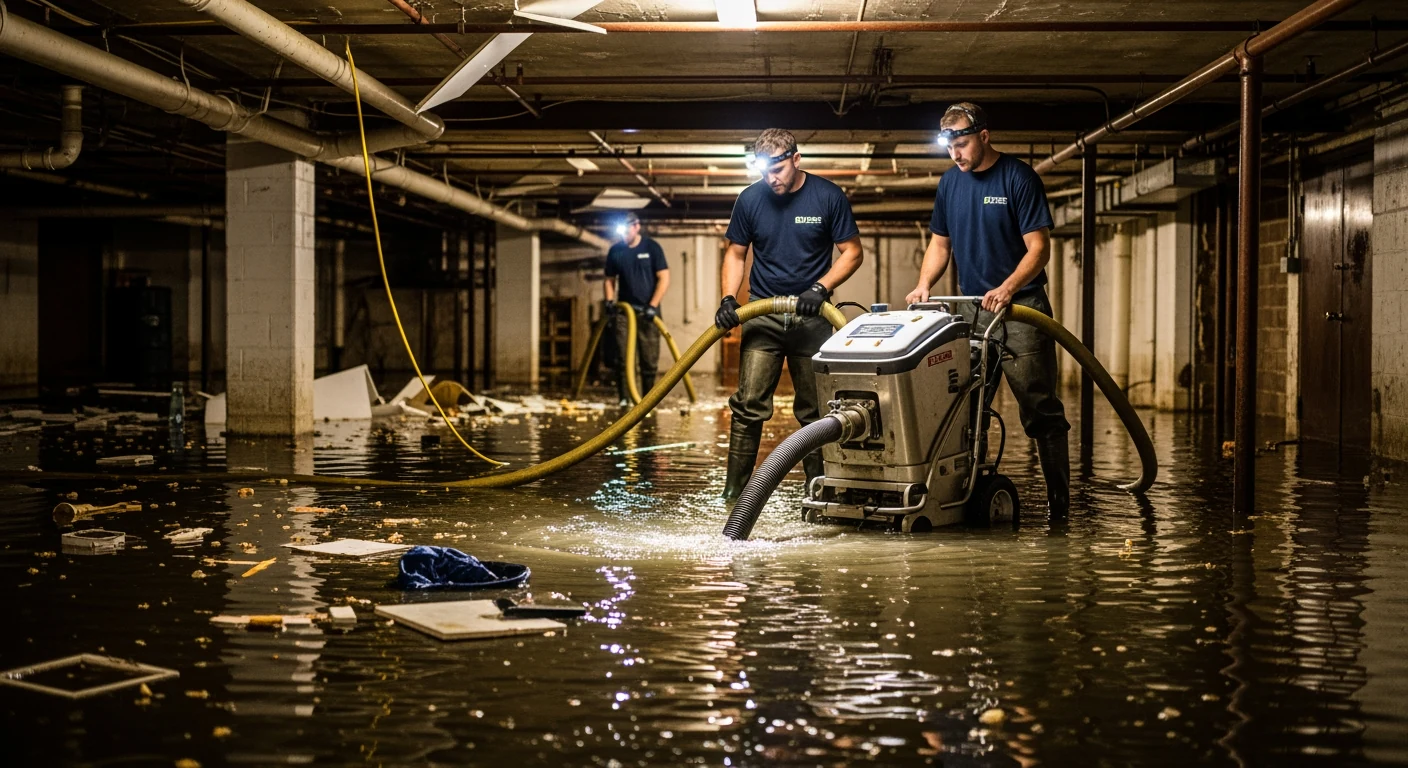
Upper Restoration provides professional water and flood damage restoration services across Nassau County, Suffolk County, and all five NYC boroughs — available 24/7.
Identifying different types of mold in your attic is a crucial step in maintaining a healthy home environment. By understanding what to look for and how to conduct a thorough inspection, you can catch mold problems early and take appropriate action. Remember, when in doubt, it’s always best to consult with a professional mold remediation specialist to ensure the safety of your home and family. Regular inspections and preventive measures are key to keeping your attic mold-free and your home structurally sound for years to come.
2026 Update: Why Attic Mold Is Getting More Attention in Long Island Homes
Attic mold on Long Island reached record inspection rates in 2025–2026, driven by two factors: a series of wet summers that elevated attic humidity beyond ventilation capacity, and increased buyer due diligence requiring mold inspections before real estate transactions. If your home was built before 2000 and hasn’t had an attic inspection recently, it’s likely overdue.
The Most Common Mold Types Found in Long Island Attics in 2026
Cladosporium (Green-Black Surface Mold)
The most common attic mold on Long Island. Appears as olive-green to black clusters on roof sheathing and rafters. Grows in cool, damp conditions — especially on the north-facing roof deck where condensation accumulates. Not acutely toxic but triggers respiratory irritation and signals a ventilation problem that will worsen over time.
Stachybotrys chartarum (Black Mold)
The variety homeowners fear most. Requires sustained high moisture (wet wood, not just humidity) to colonize. In attics, found most commonly on sheathing below roof leaks, around damaged flashing, or where bathroom exhaust fans terminate inside the attic instead of outside. Produces mycotoxins — professional remediation required.
Penicillium / Aspergillus (Blue-Green, Fast-Spreading)
Often appears after water damage events. Spreads faster than Cladosporium and can colonize insulation as well as wood. Blue-green or white coloration. Particularly common in attics above bathrooms where steam exhaust was improperly vented.
Serpula lacrymans (Dry Rot Fungus)
Not technically a mold but often found alongside mold in Long Island attics. Brown and crumbling, attacks structural wood. Often confused for mold — requires a licensed inspector to differentiate. Serious structural implications if left untreated.
What Causes Attic Mold in Long Island Homes
- Inadequate ventilation: The #1 cause. Soffit and ridge vents blocked by insulation or pest activity trap humid air against the roof deck.
- Bathroom exhaust fans terminating in the attic: Code violation in most municipalities — direct moisture source onto roof sheathing. Extremely common in pre-1990 Long Island construction.
- Roof leaks: Even minor slow leaks create sustained moisture conditions that accelerate mold growth within weeks.
- Ice dams: Long Island nor’easters create ice dams that allow water to back up under shingles and saturate sheathing.
- Whole-house humidity migration: Humid interior air rises and accumulates in poorly sealed attic spaces.
2026 Remediation Standards for Long Island Attic Mold
NYS Labor Law Article 32 requires a licensed mold assessor to provide a written protocol before any remediation exceeding 10 square feet begins. Post-remediation clearance testing by an independent assessor is required before the space is considered cleared. Typical attic mold remediation on Long Island costs $4,000–$12,000 depending on extent and affected square footage.
Remediation without addressing the moisture source always results in recurrence. Upper Restoration’s attic mold process always includes a root cause analysis and moisture source correction as part of scope.
What Does Mold in the Attic Look Like? Visual Identification Guide
Attic mold is rarely the dramatic black slime of popular imagination. Most attic mold presents subtly — as discoloration, surface fuzz, or a change in wood texture that’s easy to miss on a quick inspection. Knowing what to look for is the difference between catching a problem early and discovering it during a home sale.
Here is what the most common attic mold types actually look like:
- White or gray fuzzy growth on wood surfaces: Usually Penicillium or Aspergillus in early stages. Often appears on roof sheathing near ridge vents or along rafter edges where humidity concentrates. Looks like a fine dusting or fuzzy coating.
- Green or olive surface staining: Cladosporium is the most common culprit. Appears as flat, powdery patches on OSB sheathing, blocking boards, or plywood decking. Often mistaken for dirt or age staining.
- Black or dark brown streaking on rafters: Can be Stachybotrys (black mold) if the wood has been consistently wet, or more commonly Cladosporium or Aureobasidium. True Stachybotrys requires sustained moisture — it grows on wet, cellulose-rich material and has a slimy texture when active.
- Gray-white webbing between structural members: Serpula lacrymans (dry rot fungus) develops a distinctive mycelial web, often with orange or rust-colored fruiting bodies. Associated with prolonged moisture and causes rapid structural degradation.
- Dark rings or halos around nail heads: Condensation collecting on metal fasteners creates a recurring wet spot on the sheathing around each nail. This produces a characteristic ring pattern and is one of the earliest visible signs of a ventilation problem before visible mold growth spreads.
Mold in the Attic vs. Normal Wood Discoloration
Not every dark spot in an attic is mold. Wood naturally darkens with age, and tannin bleed, sap stains, and construction dirt are common in older attics. The key tests:
- Smell: Active mold produces a musty, earthy odor that intensifies in humid weather. A clean attic smells like wood and dust. If the smell intensifies when it rains, moisture infiltration is active.
- Texture: Mold growth has a fuzzy, powdery, or slimy texture depending on species. Natural wood aging produces flat discoloration without surface texture change.
- Pattern: Mold tends to follow moisture pathways — along rafters, near ridge or soffit vents, around penetrations. Random, patchy discoloration without a moisture-logic pattern is more likely staining.
- The bleach test: Apply a small drop of household bleach to a suspect spot. If the discoloration lightens within a minute or two, it is likely mold or mildew. If it does not change, it is more likely dirt or sap stain.
When in doubt, testing is the only definitive answer. Surface sampling or air quality testing by a certified inspector provides laboratory confirmation of species and concentration — information that is required under NYS Article 32 before licensed remediation can begin.
Free Mold Assessment — NYC & Long Island
Found Mold in Your Attic? Get a Certified Inspection Today.
Serving NYC & Long Island — Nassau & Suffolk Counties
📞 Call (516) 777-7001
Or fill out our free assessment form →